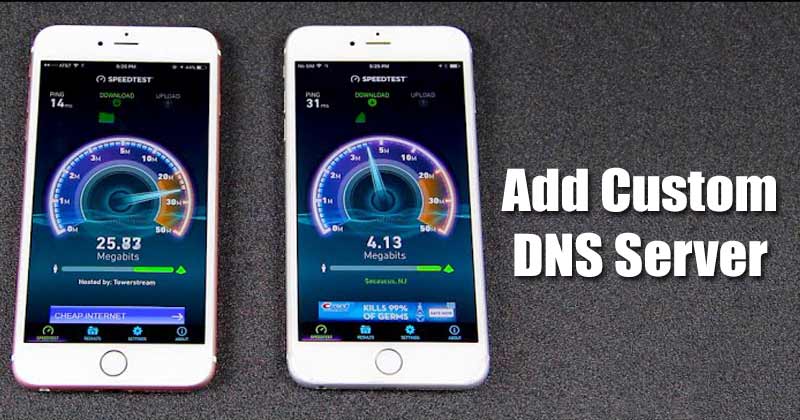
But, before sharing the method, let’s know how DNS works and what its role is. DNS or Doman name system is an automated process that matches the domain names to its IP Address.
What is DNS?
Regardless of the device you are using, when you enter a URL in the web browser, the role of DNS servers is to look at the IP Address associated with the domain. If matched, the DNS server comments on the visiting website’s web server, and hence the web page is loaded. This is an automated process, and you don’t need to do anything in most cases. However, there are times when the DNS server fails to match the IP Address. At that time, users get various DNS-related errors on the web browser as DNS probe started, DNS Lookup failed, DNS server not responding, etc.
Steps to Add Custom DNS Server On iPhone
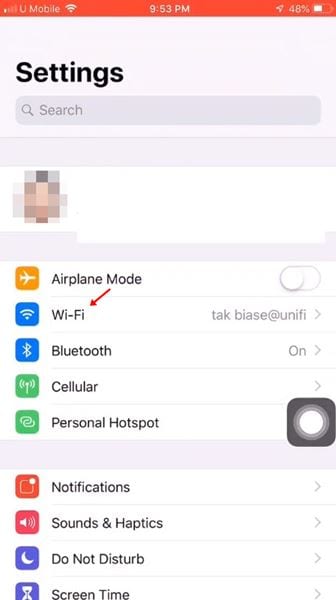
All of the DNS-related problems can be easily fixed by using a custom DNS server. On an iPhone, you can easily set a custom DNS server without installing any app. Below, we have shared a detailed guide on adding a custom DNS server on the iPhone. Let’s check out. Step 1. First of all, open the ‘Settings’ app on your iOS device.
Step 2. On the Settings page, tap on the ‘Wi-Fi’ option.
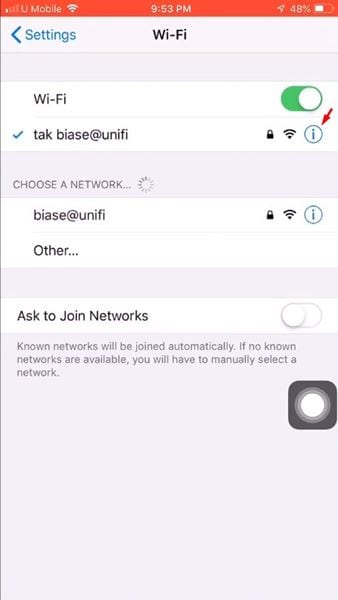
Step 3. On the WiFi page, tap on the (i) sign located behind the WiFi name.
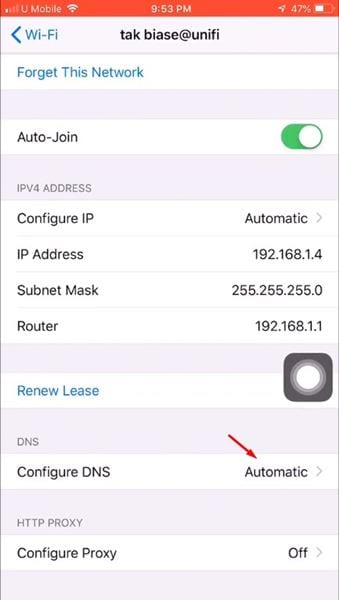
Step 4. On the next page, scroll down and find the ‘Configure DNS’ option.
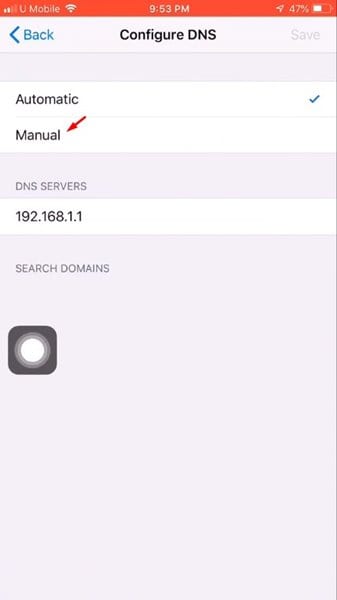
Step 5. Tap on the Configure DNS option and select the ‘Manual’ option.
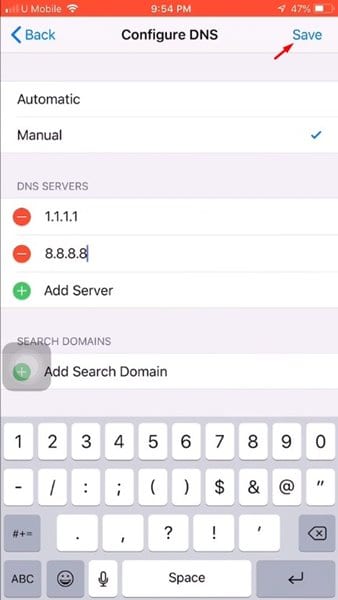
Step 6. Now tap on the ‘Add Server’ option, add the DNS servers there, and tap on the ‘Save’ button.
Step 7. Once done, the WiFi network will re-connect. That’s it! You are done. This is how you can change the DNS server on an iPhone. You can explore a complete list of the Best Free & Public DNS Servers, and choose the one that fits well for you.
Alternative Apps
Well, you can even use third-party DNS changer apps on iPhone to change the default DNS server. Below, we have listed some of the best DNS changer apps for iPhone. Let’s check out.
1. Trust DNS
Well, Trust DNS is one of the best DNS changer app available for the iPhone. The DNS Changer application for iPhone helps you protect your privacy by encrypting your DNS requests. By default, Trust DNS offers you 100+ free public DNS servers. Apart from that, it also has a separate section for DNS servers with ad-blocking functionality.
2. DNSCloak
DNSCloak is another best DNS client that you can use on your iPhone. The app helps you override & secure your DNS with DNSCrypt. If you don’t know, DNSCrypt is a protocol that authenticates communications between a DNS client and a DNS resolver. The app works with both WiFi and cellular data. You can manually add your preferred DNS server with this app. Overall, DNSCloak is an excellent DNS changer app for iPhone. So, this article is all about how to change the DNS server settings on an iPhone. I hope this article helped you! Please share it with your friends also.
Δ